Remember that time you tried to repaint your bedroom, eager to get it done and enjoy the fresh look? You slapped on the first coat, convinced it would dry instantly, only to smudge it with your sleeve an hour later. We’ve all been there! Knowing how long does wall paint take to dry can save you a lot of frustration and wasted time. This post will explore the factors influencing paint drying, providing you with tips and tricks for a smooth painting experience. You’ll learn everything you need to know to avoid ruining your fresh coat and achieve professional-looking results. Let’s get started, so you can transform your space without the paint-related mishaps!
Factors Influencing Paint Drying Time
Several variables impact how fast your paint dries, transforming your home makeover project. The environment, paint type, and the surface all play vital roles in the drying process. Recognizing these elements allows you to manage expectations and ensure a perfect finish. Taking these aspects into consideration guarantees that you can plan your painting timeline successfully, avoiding any unwelcome surprises like accidentally touching a wet wall. Knowing the impact of each of these factors on your paint can ensure optimal results.
Environment’s Role in Paint Drying
The conditions of the room you’re painting have a major impact on the paint’s drying speed. Higher humidity levels, for instance, slow down drying. The air holds more moisture, preventing the paint from properly curing. On the other hand, warmer temperatures tend to speed up the process. A well-ventilated space is key, as it promotes airflow, allowing the paint’s solvents to evaporate quicker, while minimizing drying time. Controlling your environment is essential for beautiful results.
- Temperature: Warm temperatures speed up the drying time. Aim for a room temperature that is neither too hot nor too cold. Extremes can lead to uneven drying.
- Humidity: High humidity slows down the drying process. Try to paint on a day with lower humidity, or use a dehumidifier to remove excess moisture from the air.
- Ventilation: Proper ventilation is crucial. Open windows and doors, or use fans, to circulate the air and help the solvents evaporate, speeding up drying.
- Airflow: Good airflow prevents paint from becoming trapped and allows air circulation for drying. Stagnant air leads to slower drying times.
Paint Type and Its Impact on Drying
Different paints have varying formulas, impacting their drying times significantly. Latex paints, for example, typically dry faster than oil-based paints. The chemical composition of the paint determines how quickly it cures. Water-based paints generally dry faster, making them a popular choice for quick projects, while oil-based paints need more time. Carefully examining the paint can and reading the product details will give you an estimate of the drying time and other relevant information before you start your paint job.
- Latex Paint: Generally dries faster than oil-based paints, often allowing for recoating within a few hours. These paints are water-based and easy to clean up.
- Oil-Based Paint: These paints take longer to dry, sometimes requiring 6-8 hours or longer for a single coat. They are known for their durability but require solvents for cleaning.
- Acrylic Paint: Dries relatively quickly and is known for its flexibility and resistance to cracking. These paints are also water-based.
- Specialty Paints: Consider the type you have, such as chalkboard paint or epoxy, as their drying times vary. Always check the manufacturer’s instructions for drying times.
Surface Preparation and Its Effect
The surface you’re painting on affects how quickly the paint dries. A porous surface, like new drywall, tends to absorb the paint, potentially slowing the drying time because the paint is sinking in, so it takes longer to set up on the surface. Smooth, non-porous surfaces allow the paint to dry quicker, as the paint sits on top. Preparing the surface properly, by cleaning and priming, ensures the paint adheres well and dries uniformly. Properly preparing the surface ensures good paint adhesion and also prevents defects from forming.
- Cleanliness: A clean surface allows for the paint to adhere properly. Removing dust, dirt, and grease will ensure a good bond and promote faster drying.
- Priming: Priming porous surfaces, such as new drywall, helps to seal the surface, preventing the paint from absorbing too deeply, which can slow down drying.
- Texture: A rough surface can absorb more paint than a smooth one, potentially extending the drying time.
- Surface Material: Different materials react differently to paint. For example, wood might require a primer before painting, depending on the paint type.
Understanding Paint Drying Stages
Paint doesn’t magically dry all at once. It goes through various stages, each with its own characteristics and importance. Recognizing these stages helps you know when you can safely apply another coat, or when you can start using the newly painted space. Knowing these stages can prevent smudges or other damage.
Touch Dry
The touch-dry stage is when the surface feels dry to the touch, but the paint hasn’t fully cured. This means you can lightly touch the surface without leaving a mark. However, it’s essential not to apply pressure or rub the surface at this stage, as it’s still relatively delicate. The touch-dry time is the first indication that the paint is beginning to set. Typically, this can take anywhere from 30 minutes to a few hours, depending on the paint type and environmental conditions. Knowing this will help you to know when it is okay to apply another coat of paint or begin the next steps.
- Characteristics: The surface feels dry to the touch, but the paint film is still soft underneath.
- Precautions: Avoid putting any pressure or rubbing the surface, as this can still damage the paint film.
- Duration: This stage usually lasts from 30 minutes to a few hours, depending on the paint and environmental factors.
- Significance: It indicates the beginning of the drying process but does not mean the paint is ready for use.
Recoat Time
Recoat time is how long you must wait before applying another layer of paint. This is an important step when painting, and waiting too short or too long can ruin your paint job. It will also influence how many coats you use. Applying a second coat too early can lead to bubbling, peeling, or uneven color. Recoat times vary depending on the paint type and manufacturer’s instructions. Always check the product label for the recommended time between coats. Properly following the specified recoat time will ensure a smooth, durable finish.
- Definition: The recommended time to wait before applying a second coat of paint.
- Impact: Applying a second coat too soon can cause issues such as bubbling or uneven color, and applying a second coat too late can cause adhesion problems.
- Variation: Recoat times vary from a few hours to several days, depending on the paint and brand.
- Importance: Following the manufacturer’s recommendations for recoat time is crucial for achieving the best results.
Dry to Handle
The dry-to-handle stage means the paint film has sufficiently hardened that you can gently handle the surface without leaving a mark. While you can touch it without worry, the paint is still not fully cured. At this point, you can move furniture against the wall or handle items that may come into contact with the painted surface, so it’s important. The dry-to-handle time is typically longer than the touch-dry time, often several hours to a day, depending on the paint type and environment. However, avoid heavy use until the paint is fully cured to prevent any potential damage.
- Definition: The point when the paint film has hardened enough to be gently handled without damage.
- Function: Allows light contact with the surface without causing marks or damage.
- Duration: Usually takes several hours to a day, varying depending on the paint type and environmental factors.
- Consideration: While it is okay to lightly handle the surface, avoid heavy impact or friction.
Full Cure
Full cure means that the paint has completely hardened and reached its final state of durability. The solvents have fully evaporated, and the paint film has bonded with the surface. Once the paint is fully cured, it can withstand cleaning, heavy use, and resist scratches or wear. Achieving a full cure can take several days or even weeks, depending on the type of paint and environmental conditions. Be patient and wait until it is fully cured before putting your space into heavy use, which can extend the lifespan and protect the quality of your newly painted surfaces.
- Significance: The paint has reached its maximum hardness, durability, and resistance.
- Timeline: Full cure can take several days or even weeks, depending on the paint type and environment.
- Use: At this stage, the surface can withstand cleaning and heavy use.
- Impact: Ensures the paint film’s long-term performance and durability.
Practical Tips for Managing Paint Drying
Taking a few extra steps can significantly influence the paint drying process, helping you achieve a professional-looking finish. These strategies not only improve the appearance of the paint job but also make sure it lasts longer. From setting up the room to choosing the appropriate paint, each technique can help you manage your painting project successfully. By following these practical tips, you can transform your space without the paint-related mishaps.
Preparing the Painting Area
Proper preparation is key to a successful paint job and has a big impact on the drying process. Start by cleaning the surface to remove any dirt, dust, or grease. Then, tape off areas you don’t want to paint, such as trim or windows. Good ventilation is crucial. Open windows and doors to allow for adequate airflow, or use fans to improve air circulation. Before you start painting, ensure the room temperature is ideal for the paint you are using, as extremes can affect drying.
- Clean the Surface: Remove dust, dirt, and grease from the walls to ensure good paint adhesion.
- Protect Non-Painted Areas: Use painter’s tape to protect trim, windows, and other areas you don’t want to paint.
- Improve Ventilation: Open windows and doors, or use fans, to provide good airflow and encourage faster drying.
- Control Temperature and Humidity: Try to paint in a moderate temperature and humidity environment for best results.
Choosing the Right Paint
The type of paint you choose dramatically influences the drying process and the final result. Consider water-based latex paints, which generally dry quickly and are easy to clean. Oil-based paints take longer but offer greater durability. Choose a paint that suits the surface and the project. For example, a bathroom might need a moisture-resistant paint, while a kitchen may require a paint that’s easy to clean. Always read the product label to know the exact drying times and suggested application methods. Selecting the right paint for the job can make a big difference.
- Latex Paint: Dries quickly and is water-based, making it easy to clean up.
- Oil-Based Paint: Dries slower but offers greater durability and is ideal for areas prone to wear.
- Acrylic Paint: Provides good flexibility and resistance to cracking, with a moderate drying time.
- Check the Label: Always read the paint label for drying times, recommended application methods, and other specific instructions.
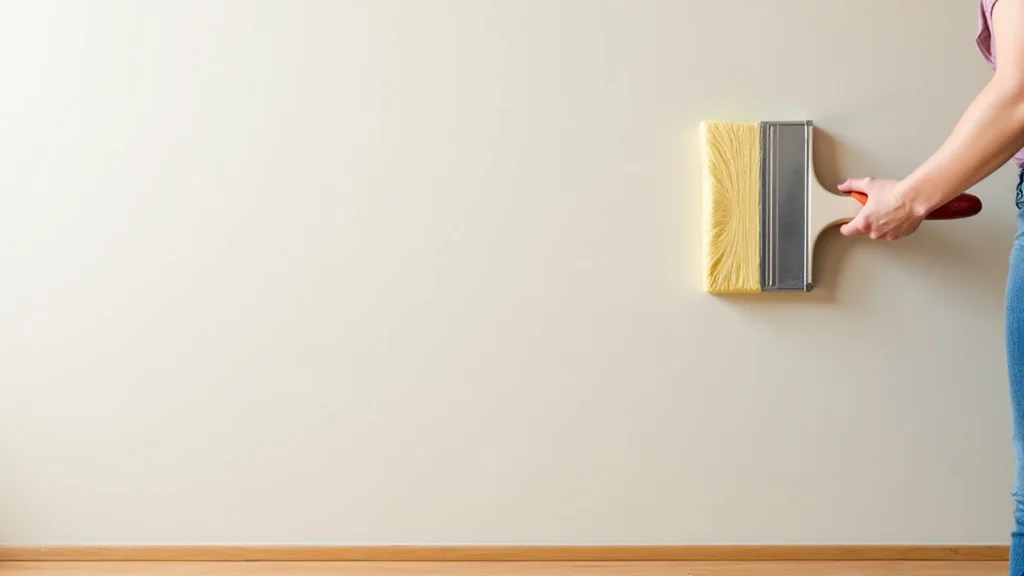
Application Techniques for Faster Drying
The way you apply the paint significantly affects the drying time and quality of the finish. Apply thin, even coats to ensure even drying and prevent drips. Avoid applying too much paint at once, which can create a thick film that takes longer to dry and may lead to issues such as cracking or peeling. Use a high-quality brush or roller to ensure uniform coverage. Following the manufacturer’s suggestions on drying, recoating, and application will help you get the best outcome for your project.
- Thin Coats: Apply thin, even coats of paint to promote faster drying and prevent drips.
- Avoid Over-Application: Don’t apply too much paint at once, as it can extend drying times and cause issues like cracking or peeling.
- Use Quality Tools: High-quality brushes and rollers help achieve even coverage and reduce the need for multiple coats.
- Follow Manufacturer’s Instructions: Always follow the paint manufacturer’s recommendations for drying times, recoating times, and application methods.
Common Problems and Solutions Related to Drying Times
Sometimes, despite your best efforts, things can go wrong. Recognizing common problems related to paint drying and knowing how to fix them can save you from a lot of stress. Bubbling, cracking, or uneven drying can occur if you fail to take the proper steps or address environmental problems. Knowing these typical issues and how to resolve them ensures a smooth, professional-looking outcome.
Bubbling and Blistering
Bubbling and blistering are common issues that occur when air gets trapped under the paint film, often due to applying paint in too thick of a coat or painting in humid conditions. To avoid this, apply thin, even coats and make sure the surface is clean and properly prepared. If bubbling occurs, let the paint dry completely. Then, lightly sand the area, remove the imperfections, and reapply the paint in a thinner coat. Correcting these issues is essential for a smooth finish.
- Causes: Applying paint too thick, painting in humid conditions, or painting over a dirty surface.
- Solutions: Allow the paint to dry completely, sand the affected area lightly, remove imperfections, and reapply the paint in thinner coats.
- Prevention: Ensure the surface is clean, apply thin coats, and avoid painting in high humidity.
- Tips: Always check the environmental conditions and the recommended drying times for the paint you are using.
Cracking and Peeling
Cracking and peeling can happen when paint dries too quickly or is applied over an improperly prepared surface, or if it is exposed to extreme conditions. To solve this, let the paint completely dry, remove the damaged areas, and sand the surface. Then, prime the surface again and apply new coats of paint. Also, make sure that the surface is clean and primed properly. Taking these steps is crucial for ensuring the paint adheres well and achieves a smooth finish. Proper surface preparation will greatly reduce the chance of cracking or peeling.
- Causes: Paint drying too quickly, poor surface preparation, or applying paint over an existing cracked surface.
- Solutions: Let the paint dry, remove the damaged paint, sand the surface, prime again, and reapply the paint.
- Prevention: Properly prepare the surface, apply thin coats, and avoid extreme temperatures or humidity during drying.
- Tips: Using quality materials and products and following the manufacturer’s directions can help avoid cracking and peeling.
Uneven Drying
Uneven drying creates an inconsistent appearance and can be caused by uneven application, poor ventilation, or varying temperatures across the painted surface. To solve this, ensure that you apply an even coat of paint and maintain consistent conditions during the drying process. Make sure the room has good ventilation and that the temperature and humidity levels are consistent throughout. If uneven drying occurs, try to gently sand the area and apply an additional thin coat of paint. Following these tips ensures a uniform, appealing result.
- Causes: Uneven application of paint, poor ventilation, or varying temperatures and humidity.
- Solutions: Ensure an even paint application, provide good ventilation, and maintain consistent temperature and humidity.
- Prevention: Apply paint evenly, use proper ventilation, and regulate the environment during the drying process.
- Tips: Check for proper drying times and ensure you are using the correct application techniques for optimal results.
Alternative Drying Methods
While patience is key, there are alternative methods you can use to influence the drying process. These methods can speed up the process, especially when you need to finish a project quickly. From the use of fans to the use of heat, understanding these alternatives can help you adjust your strategy based on your unique needs. However, always ensure these methods are used carefully, as improper application can impact the paint’s quality.
Using Fans and Dehumidifiers
Fans and dehumidifiers can significantly improve the drying time. Fans increase air circulation, speeding up the evaporation of solvents. Dehumidifiers remove moisture from the air, which is essential, as excess humidity slows down drying, particularly in humid environments. Position fans to circulate air without blowing directly onto the painted surface, which can cause uneven drying. Run the dehumidifier to reduce humidity to speed up the process. Using these tools in tandem can offer a faster drying process, allowing you to complete your project promptly.
- Fans: Increase air circulation to speed up the evaporation of solvents and promote faster drying.
- Dehumidifiers: Remove moisture from the air to speed up the drying process, especially in humid environments.
- Positioning: Position fans to circulate air without directly blowing on the painted surface.
- Combined Use: Combining fans and dehumidifiers can create a more efficient drying environment.
Gentle Heat Application
Gentle heat can help speed up the paint-drying process. You can gently heat the room, but it’s important to do so with caution. Using a space heater can increase the room’s temperature, but be careful not to overheat the paint, as this can lead to issues. Avoid direct heat application, such as using a hairdryer directly on the surface, as this can cause uneven drying. Maintaining a balance between gentle heat and proper ventilation is key. A controlled increase in temperature, combined with good air circulation, can accelerate drying without compromising the quality of the finish.
- Controlled Heat: Gently heat the room using a space heater, avoiding overheating.
- Indirect Heat: Avoid direct heat application like hairdryers, which can cause uneven drying.
- Ventilation: Combine gentle heat with proper ventilation to allow solvents to evaporate efficiently.
- Cautions: Overheating the paint can lead to cracking or other finish problems.
Avoiding Direct Sunlight
While sunlight may seem beneficial, direct sunlight can sometimes hinder the paint-drying process, especially in certain situations. Direct sunlight can cause uneven drying and may lead to blistering or other defects. If painting outdoors or in a sunlit room, try to avoid painting during peak sun hours. Ensure the painted surface is protected from direct exposure. Painting in the shade or on a cloudy day can help achieve a more uniform result. Protect your project from direct sunlight for the best outcome.
- Impact: Direct sunlight can cause uneven drying and may lead to blistering or other defects.
- Timing: Avoid painting during peak sun hours or in direct sunlight.
- Protection: Ensure the painted surface is protected from direct exposure.
- Alternatives: Painting in the shade or on a cloudy day can help achieve a more uniform result.
Frequently Asked Questions
Question: How long does a coat of paint take to dry to the touch?
Answer: It can range from 30 minutes to a few hours, depending on the paint type and the environmental conditions. Latex paints often dry to the touch quicker than oil-based paints.
Question: Can I apply a second coat of paint before the first coat is completely dry?
Answer: No, applying a second coat too soon can cause issues like bubbling, peeling, or uneven color. Always wait for the recommended recoat time, as stated on the paint can.
Question: How do temperature and humidity affect paint drying time?
Answer: Higher temperatures generally speed up drying, while higher humidity slows it down. Try to paint in moderate temperature and lower humidity for the best results.
Question: What’s the difference between “touch dry” and “fully cured”?
Answer: “Touch dry” means the surface feels dry to the touch, but the paint hasn’t fully hardened. “Fully cured” means the paint has completely hardened and reached its maximum durability, which can take days or weeks.
Question: Can I use fans to speed up the paint-drying process?
Answer: Yes, fans can help by circulating air and speeding up the evaporation of solvents, which helps the paint dry faster. Position the fans to ensure adequate ventilation.
Final Thoughts
Understanding how long does wall paint take to dry is crucial for a successful painting project. It depends on several aspects, including the type of paint, environmental conditions like temperature and humidity, and how well you prepared the surface. Recognizing the different stages of drying, from touch dry to full cure, will allow you to plan your painting steps properly, making sure you get the best outcome. Also, knowing how to solve the common issues, such as bubbles and cracking, ensures a smooth and long-lasting finish. By using the practical tips provided here, you’ll be able to create a lovely, updated space without any paint-related frustrations. So, gather your supplies, follow these guidelines, and prepare to bring a new look to your home with a fresh coat of paint!