Picture this: It’s a crisp autumn afternoon, and the air smells of freshly harvested vegetables. You’ve spent the morning gathering a bounty of plump, vibrant green beans from your garden. Now, the question is, how do you preserve their delicious flavor and nutrients for months to come? You’re preparing to start the pressure canning process. This guide provides the answers you need to make sure your green beans are safe to eat, and taste amazing when you open that jar. You’ll explore the necessary steps, ensuring your pantry is stocked with home-canned goodness. By the end of this article, you will be equipped with the knowledge to safely and successfully can your green beans. This will help you know how long to pressure can green beans and the process.
Pressure Canning Basics for Green Beans
Pressure canning is a critical process when it comes to preserving low-acid foods like green beans. Unlike water bath canning, which is suitable for high-acid foods such as jams and jellies, pressure canning uses high heat generated under pressure to eliminate botulism-causing bacteria. This ensures the safety of your canned goods. Knowing the correct time and pressure is essential for safe and successful canning. Without proper pressure canning, your green beans could become a health risk.
Why Pressure Canning Is Necessary
Green beans, like many other vegetables, are low-acid foods. This means they don’t have enough natural acidity to prevent the growth of harmful bacteria during storage. The most significant threat is Clostridium botulinum, which produces a deadly toxin in low-acid, oxygen-free environments. Standard boiling-water canning isn’t hot enough to eliminate this bacterium. Therefore, pressure canning is a must for safely preserving green beans. This method elevates the temperature above the boiling point of water, destroying the botulism spores and making your home-canned green beans safe to eat.
- The botulism bacteria thrive in low-acid, anaerobic conditions. Pressure canning eliminates the oxygen, and heat destroys the spores.
- If these spores survive and grow in your canned green beans, they can produce a deadly toxin that causes botulism.
- Symptoms of botulism can include double vision, drooping eyelids, difficulty swallowing, and muscle weakness. This is a severe, life-threatening condition.
Remember, safety is not something you can guess at. It requires precise techniques to prevent the danger of consuming unsafe food. Following the correct pressure canning procedures is the best way to safeguard your health and enjoy your home-canned green beans without worry.
Equipment You Will Need
To begin pressure canning green beans, you will require specific equipment. These tools guarantee the safety and quality of your canned goods. Proper equipment is not just for convenience, it is a key factor in ensuring your food is preserved safely. It’s the most important factor in your canning experience. There are no shortcuts with food safety; each piece of equipment plays an important role in the overall process. This section provides a list and explanation of the tools needed.
- Pressure Canner: The core of the operation. This is a heavy-duty pot that can reach and maintain high pressures. The size of the pressure canner will determine how many jars you can process at once. Make sure your canner is in good condition, with a working pressure gauge and safety features.
- Canning Jars: Use standard canning jars designed for pressure canning. Mason jars with two-piece lids work best. Be certain to check for any chips or cracks before using. Do not reuse lids, as their seals are designed for one-time use.
- Lids and Bands: New lids are essential for each canning batch, ensuring a proper seal. The bands secure the lids during the canning process.
- Jar Lifter: This tool allows you to safely remove hot jars from the pressure canner without burning yourself.
- Ladle, Funnel, and Measuring Cup: Used to fill the jars with the green beans and liquid, these tools help avoid spills. A funnel specifically designed for canning jars is useful.
- Bubble Remover: A thin, non-metallic utensil to release any air bubbles trapped in the jar.
- Clean Towels or Cloths: Keep your work area clean, and use clean cloths to wipe the jar rims before placing the lids.
- Timer: Necessary for keeping track of processing times.
Having the correct equipment is the first step toward successful and safe canning. Each item contributes to the outcome, from the sturdy pressure canner to the simple jar lifter. Without this equipment, you will be unable to safely home can green beans.
Preparing the Green Beans
Before you begin the pressure canning process, you need to prepare the green beans themselves. This includes selecting the beans, washing and trimming them, and packing them into jars. The quality of your canned green beans starts with this initial preparation. The extra effort you put into these steps will affect the taste and texture of your finished product. The preparation will determine how long to pressure can green beans.
Selecting and Washing the Green Beans
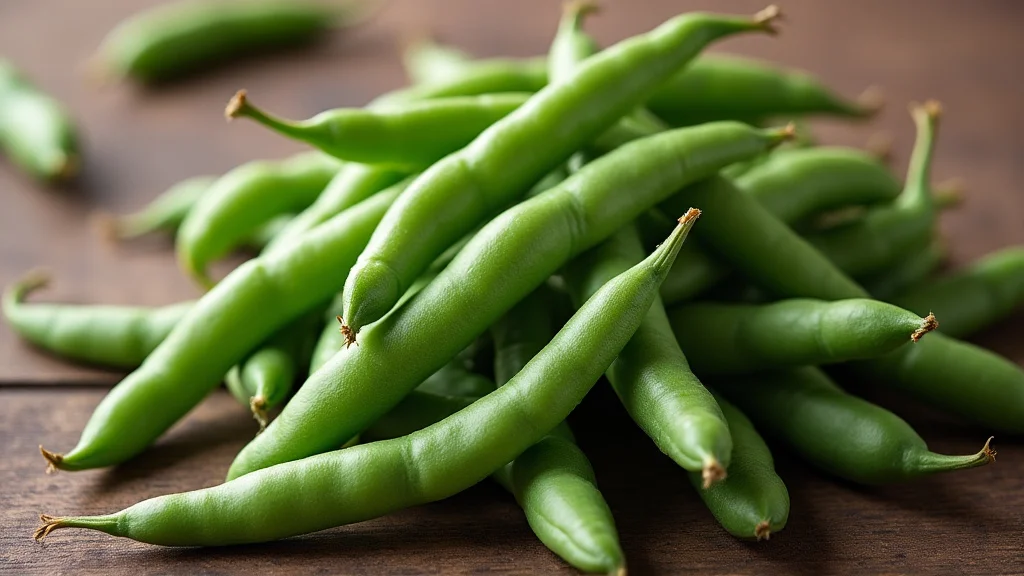
The best green beans for canning are fresh and of good quality. Choose beans that are firm, crisp, and free from blemishes. Younger beans are usually more tender than older ones. You can use your own garden-grown beans or purchase them from a farmer’s market or grocery store. Once you have selected your beans, it’s time to wash them properly. Rinse the green beans thoroughly under cold, running water. This removes any dirt or debris that might be present. Be sure to remove any stems or damaged parts during the washing process to ensure the highest quality canned product.
- Choose Fresh Beans: Look for firm, crisp green beans. Avoid any with blemishes or soft spots.
- Wash Thoroughly: Rinse the beans under cold, running water to remove any dirt or residue.
- Trim the Ends: Remove both ends of each bean. You can use a knife or snap them off.
- Size Matters: Cut or snap the beans into pieces of uniform size for even packing.
Careful selection and washing are the first steps to making delicious and safe canned green beans. Preparing them in this manner will make for a good finished product. From here, you can move on to the actual canning process.
Packing the Jars
After you have washed and trimmed your green beans, it’s time to pack them into your jars. There are two primary ways to pack green beans: raw pack and hot pack. Each method has its own benefits, and the choice depends on your personal preference. Choosing the right method will influence the texture and appearance of your canned green beans. The canning method will not change how long to pressure can green beans.
- Raw Pack: The raw pack method involves packing the fresh, raw green beans tightly into the jars. Then, you add boiling water or a brine (a solution of salt and water) over the beans, leaving the required headspace. The advantage of raw packing is its simplicity; it is quicker and requires less preparation.
- Hot Pack: The hot pack method involves blanching the green beans in boiling water for a few minutes before packing them into the jars. The blanching process helps to soften the beans, remove air pockets, and reduce shrinkage. You then pack the blanched beans into the jars and add boiling water or brine, leaving the headspace.
- Headspace: Regardless of the packing method, it’s vital to leave the appropriate headspace in each jar. This space allows for expansion during processing. The standard headspace for green beans is one inch.
- Bubble Removal: After packing the beans and adding liquid, use a bubble remover or non-metallic utensil to eliminate any trapped air bubbles. Air bubbles can affect the seal.
No matter which method you use, the correct packing and headspace are essential. These steps guarantee proper sealing and ensure the safety of your canned goods. Proper packing and head space are just as important as knowing how long to pressure can green beans.
Pressure Canning Green Beans: The Process
This is the moment you have been waiting for. Here is the step-by-step process of pressure canning your green beans, covering everything from preparing the canner to ensuring a proper seal. This is the heart of the process. If you follow this process precisely, you will be able to can your green beans safely and efficiently. Remember, safety is always the priority. Taking the time to do this correctly is more important than speed.
Preparing the Pressure Canner
Before you load your jars, you need to prepare your pressure canner. This involves adding the correct amount of water, setting up the jars, and getting everything ready for the canning process. Proper preparation of the pressure canner will make sure the process runs smoothly and that the green beans are safely canned. This pre-work is vital.
- Add Water: Consult your pressure canner’s manual for the correct amount of water to add to the bottom of the canner. This is typically two to three inches. The water is heated to create steam, which is what builds up the pressure needed for canning.
- Place the Rack: Place the canning rack inside the pressure canner. This keeps the jars off the bottom of the canner, allowing the steam to circulate evenly.
- Preheat the Canner: Begin to heat the water in the canner over medium heat. This step can speed up the overall canning time and bring the water to a boil before you load the jars.
- Prepare the Lids: Place the lids in a saucepan of simmering water (not boiling). This helps to soften the sealing compound, which helps form a tight seal.
By preparing your pressure canner properly, you set the foundation for a safe and effective canning process. Once the canner is ready, you can move on to the next step, loading the jars.
Loading and Processing the Jars
Carefully load your jars into the prepared pressure canner, following the manufacturer’s instructions. Secure the lid, and bring the canner to the proper pressure for the appropriate amount of time. Processing time, and how long to pressure can green beans, is dependent on the altitude at which you are canning. This section offers the step-by-step instructions needed to ensure the green beans are canned properly. It is the most important step in the entire process.
- Place the Filled Jars: Using your jar lifter, place the filled jars in the pressure canner on the rack. Make sure the jars do not touch each other or the sides of the canner.
- Seal the Canner: Secure the lid of the pressure canner according to the manufacturer’s instructions. Ensure the vent pipe is clear.
- Vent the Canner: Before bringing the pressure up to the required level, you must vent the canner. Allow steam to escape from the vent pipe for 10 minutes. This eliminates any air that might be trapped inside, ensuring accurate pressure readings.
- Bring to Pressure: After venting, add the weight or close the petcock (depending on your canner type) and bring the pressure up to the correct level for your altitude. Check the gauge frequently to make sure the pressure is consistent.
- Maintain Pressure and Process: Once the correct pressure is reached, start timing the processing time. Maintain the pressure consistently throughout the entire processing time. Use the proper time for your altitude to make sure the green beans are safely canned.
-
Processing Time: The processing time is critical to guarantee the safety of your canned green beans.
Here is the processing time chart:
| Altitude | Processing Time (Minutes) | Pressure (PSI) |
|---|---|---|
| 0–2,000 feet | 20 | 10 |
| 2,001–4,000 feet | 20 | 11 |
| 4,001–6,000 feet | 20 | 12 |
| Above 6,000 feet | 25 | 13 |
The processing step is where you transform fresh green beans into a shelf-stable product. Proper temperature and time are essential. It’s the most crucial aspect of the canning process for food safety. Knowing how long to pressure can green beans for your altitude is essential for success. After this, all that remains is to check the seals and store the product for later enjoyment.
Addressing Common Canning Issues
Even with the most careful planning, issues can arise during the canning process. This section provides solutions to common problems that you might encounter. From sealing failures to changes in the appearance of your canned goods, this guide helps you resolve any problems that may occur. Addressing problems immediately can save a whole batch. Being prepared to solve problems is a key part of the canning process.
Seal Failures
Seal failures are a common issue in canning. A proper seal is necessary to protect the food from spoilage. There are a few reasons a jar may not seal, including problems with the lid or improper processing. This subsection explores the causes and solutions for seal failures. Understanding the reasons behind seal failures is crucial to prevent them in the future. Knowing this will help when you decide how long to pressure can green beans.
- Reasons for Seal Failure: The most common reason for a seal failure is an issue with the lid. The lids may be defective, used, or not properly prepared. Other causes include the jar rim not being clean, or not enough headspace. Additionally, processing times or pressure may be incorrect.
- How to Identify Seal Failures: After the jars have cooled for 12–24 hours, you should check each one for a proper seal. Press down on the center of the lid. If the lid flexes, the jar did not seal. Another indication is if the lid pops up and down when pressed.
- What to Do with Unsealed Jars: If a jar did not seal, you can refrigerate the contents and consume them within a few days. Do not store food from an unsealed jar at room temperature. You can reprocess the contents immediately. Replace the lid and process the jar again, following the correct processing time for your altitude. Check the jar carefully for damage before reprocessing.
- Preventing Seal Failures: Always use new lids, and follow the manufacturer’s directions for preparing them. Make sure the jar rims are clean before placing the lids, and that you have the correct headspace. Ensure that your canner is operating at the correct pressure, and that you have followed the processing times for your altitude.
Seal failures can be disappointing, but they do not have to mean wasted effort. Learning the causes and solutions for seal failures is important. Preventing seal failures will help you enjoy the fruits of your labor without worry.
Other Canning Problems
Beyond seal failures, other issues can arise during the canning process. These problems can impact the appearance, texture, and safety of your canned goods. Knowing how to recognize and address these issues will make your home canning experience much more successful. You will also understand how long to pressure can green beans, should any problems arise.
-
Cloudy Liquid: Cloudy liquid in your canned green beans can result from several causes. These include starch leaking from the beans, hard water, or improper processing. Cloudy liquid doesn’t necessarily mean the food is unsafe, but it does affect the appearance.
- Solution: Use fresh, high-quality beans, and try using filtered water. Ensure that you have followed the correct processing times. If you are using hard water, consider using a water softener.
-
Discoloration: Green beans can change color during canning. This may include a fading of color, or browning.
- Solution: Blanching the beans before packing them can help to preserve their color. Make sure your beans are fully submerged in the brine or water, as exposure to air can cause discoloration.
-
Soft or Mushy Texture: This is often due to over-processing or using older beans.
- Solution: Use the correct processing time and pressure for your altitude. Choose young, fresh beans, and be careful not to overfill the jars.
-
Spoilage: Signs of spoilage include leaks, mold, bulging lids, or a foul odor. Any signs of spoilage mean you should discard the jar.
- Solution: Always follow the correct processing instructions and use new lids. Examine jars carefully for damage before using, and ensure they are stored properly in a cool, dark place.
Being prepared to address these problems will make sure you are equipped to troubleshoot issues. Home canning can be a rewarding hobby. With this knowledge, you can confidently preserve your home-grown bounty with confidence.
Frequently Asked Questions
Question: What is the recommended processing time for pressure canning green beans at 1000 feet above sea level?
Answer: For an altitude of 1000 feet, you should pressure can green beans for 20 minutes at 10 PSI.
Question: Can I use a water bath canner for green beans?
Answer: No, green beans are a low-acid food. They need to be pressure canned to destroy the bacteria that causes botulism. Water bath canning is not suitable for this.
Question: How do I know if my canned green beans are safe to eat?
Answer: Check the seal on the jar before opening it. The lid should be indented. Before consuming, examine the contents for any signs of spoilage, such as leaks, mold, or a foul odor. If in doubt, throw it out.
Question: Can I reuse canning lids?
Answer: Canning lids are designed for single use only. The sealing compound gets damaged during processing. Therefore, you must use new lids for each canning session.
Question: What should I do if a jar of green beans does not seal?
Answer: Refrigerate the jar immediately and consume the contents within a few days. You can also reprocess the jar with a new lid, following the original instructions.
Final Thoughts
The journey from garden to pantry is a rewarding experience. Mastering the art of pressure canning green beans ensures you can enjoy the flavor of fresh-picked produce any time of the year. Remember, the key to safe and delicious home-canned green beans lies in knowing how long to pressure can green beans and following the correct procedures. You’ve explored the necessity of pressure canning for low-acid foods, the importance of proper equipment, and the steps for preparing and processing your green beans. You also know how to address common issues like seal failures and discoloration, so that you can quickly adjust if a problem arises. With this information, you are ready to venture into the world of home canning with confidence.